The Big Event! Offers on Paint, Flooring, Doors & more
Skip to content Skip to navigation menu
Basket
0

Planning & preparation

  • These modular shelving units are ideal for adding valuable storage space in compact gardens where storage options can often be limited. They’re designed to be straightforward and affordable, while offering lots of versatility.
  • Perfect for rented properties, they can be taken with you when you move and encourage investment in potted plants as opposed to beds.
  • Make them to be bespoke to your space, so that they fit perfectly in your garden. From planting areas to outdoor cooking setups, they’re great for just about anything.
  • You have complete freedom when it comes to design. You can take inspiration from existing colours in your garden to find your ideal paint colour.
  • Our step by step instructions and cutting list have been designed as a guideline. If you choose to follow our guide, one fence shelving unit will measure approximately 900mm x 1046mm x 497mm.

Doing it right

  • Make sure to measure the available space in your garden. You’ll need to make your shelves to size for the perfect bespoke fit.
  • Choose timber that can stand up to the elements - it’s going to be exposed to rain and wind outside during the colder months.
  • We recommend using sturdy fence posts for the frame and scaffold boards for the shelves.
  • When working with exterior paint and decorating accessories, work slowly to apply thin and even coats until you have your desired coverage.

Staying safe

  • Always make sure that your chop saw is unplugged while you’re setting it up or changing accessories, to ensure your safety.
  • Keeping the plug in sight acts as a visual reminder to prevent accidents and hazards.
  • For extra safety when using power tools and painting, be sure to wear protective equipment, including your ear defenders, goggles, heavy-duty gloves and a dust mask.

Deciding on your design
1.Garden_Shelf.jpeg

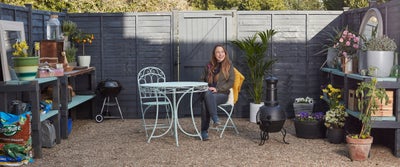
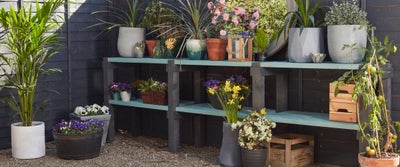
The design of your shelving will come down to how you want it to fit in your garden. A standard modular design is simpler and offers more flexibility, or alternatively you could design your build so that it’s bespoke to your space - great for factoring in tricky corners, utilising unused areas and adding storage where space is tight.

This modular build is designed so that scaffold boards sit between frames. The scaffold boards can be as short or as long as needed and reconfigured at any time to suit the size of your available space.

If you decide on a more complex, bespoke design, it might help to sketch out a plan of your shapes and dimensions before you make a start on your project.

Gathering materials and prepping your space

View instructions
2.Woman_in_Protective_DIY_Gear.jpeg

It’s important to choose the right timber, seeing as your shelving will be outside. It’s going to be exposed to the elements, so you need something that’s going to stand up to rain and wind in the colder months. We recommend using sturdy fence posts for the frame and scaffold boards for the shelves themselves.

Gather your tools and materials so that everything you need is close by. Always make sure that your chop saw is unplugged while you’re setting it up or changing accessories, to ensure your safety.

Be sure to keep yourself safe while you work with your ear defenders, goggles, heavy-duty gloves and dust mask.

Measure, mark and cut the frame cross lengths

View instructions
3.Measuring_Wood.jpeg

When it comes to the size of your shelves, you can either follow the cutting list for guidance or decide on how deep you want your shelving units to be. It’s a good idea to consider the width of the scaffold boards in comparison to your desired size, to minimise cuts.

These cross lengths support the scaffold boards and can be positioned at any height to suit your needs, so tailor them to your preferred setup.

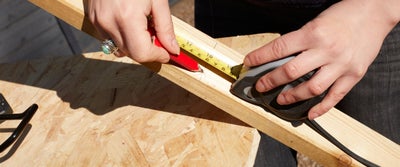
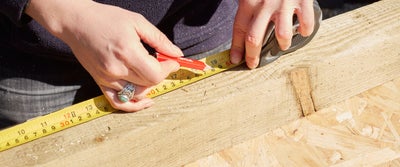
Use your own measurements as guidance and measure out your cutting points. Make a mark with a crow’s foot, before scribing a line with your square to create your cutting lines.

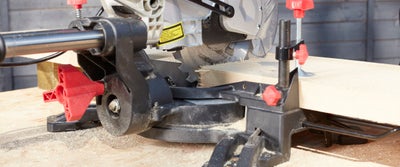
Using your chop saw, cut your frame cross lengths to size and put them aside.

Measure, mark and cut the long frame lengths

View instructions
4.Measuring_wood.jpeg

Similarly, to the frame cross lengths, you can either follow the cutting list, or decide on how tall you want your units to be and make your cuts accordingly.

Once you’re sure of your sizes, measure them out on the timber and make your marks with a crow’s foot, then scribe a cutting line with your quick square.

Once you’ve made your marks on the posts, cut them down to size using your chop saw. If you have any difficulty getting through the post in one cut, you may need to rotate it or remove a small section with a hand saw.

Measure, mark and cut the scaffold boards

View instructions
5.Cutting_Timber.jpeg

The final piece of cutting you’ll need to do is for the scaffold boards, which will become your shelves. Our units were designed to maximise a full length of scaffold board, either without cutting or cut in half to be as efficient as possible with materials.

Working with your tailored dimensions, make marks at your cutting points.

Use your chop saw to cut the scaffold board to size, before putting away any power tools that you’ve used so far.


Mark screw placements

View instructions
6.Measuring_Timber.jpeg

Now that the cutting is done, it’s time to start bringing it together. Place the cross lengths on the posts, effectively dry-laying the frame, to check where your screw placements will need to be.

Mark your screw placements with four at the end of each cross length.

If you don’t have a mortice gauge to hand, all you need is your hand and a pencil for an easy alternative when it comes to marking lines or estimate fixing distances. Use your finger or thumb as a guide against the side of your edge, and you can easily scribe a parallel line.

Securing the cross lengths to the long lengths

View instructions
7.Nails_in_Timber.jpeg

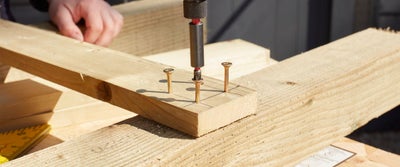
Once your screw placements are marked, drill pilot holes in each one.

Place the cross lengths in position on the posts, ensuring that they are perfectly square and ready to be fixed into place.

Twist a screw into each hole to prepare it, then secure them with your drill until they’re sitting flush to the surface.

Once all of your screws are in, turn the unit over and repeat on the other side. The screws should be about twice the thickness of the cross length timber, so they can be driven through both sides.

Once the frames are constructed, screw the long supporting cross lengths to one side of frames to create the back of the unit. If you’d prefer, you can screw this into place after painting as it can become quite heavy.

Painting the units

View instructions
8.Painting_Wooden_Fence.jpeg

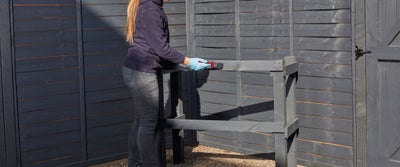
We painted our scaffold boards in a duck egg blue to complement the slate grey frames, but you can take it in any number of different directions; whether you want something loud and vibrant, some relaxed pastel colours or something darker.

Paint the frames first, giving them generous coat that starts with the joints. Be sure to work the paint in well for a nice even finish.

Once your frames are painted, move onto the scaffold boards. You can keep the look consistent with the same colour, or create some fun clash and contrast by trying out different colour options with the shelves.

When dipping your brush into the paint, try to cover no more than ¾ of the bristles. This is a really simple way to make sure your brush isn’t overloaded, which helps to prevent drips and keep your bristles in better condition.

If you’re stepping away from painting but plan to come back to it soon, wrapping your wet brushes in a disposable glove keeps it ready to go for when you return.

Give it some time to dry – you should be able to find estimated drying times on your paint tins. To achieve the best finish, apply 2 to 3 coats to make sure you’ve got full coverage. You can still add any additional touch-ups after the final coat has dried.

Once it’s completely dry, screw the long back supporting sections into place if you haven’t already.

Fitting the units

View instructions
9.Fitting_Wooden_Fence_in_Garden.jpeg

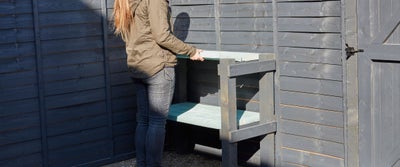
When it comes to fitting them in your garden, it’s up to you whether you want to leave them freestanding or screw them to the wall or fence.

If you want to make quick and easy adjustments, the modular design can be changed at any time to suit your needs or changing spaces.

Stand up the frame unit in position and simply drop the scaffold boards into place to fully form your shelving unit. It’s ready for any garden project big or small.

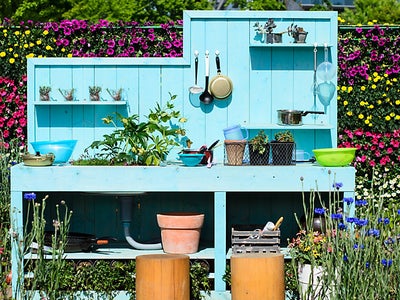
For some extra flair, why not tile the top on the scaffold boards to create an outdoor kitchen area, as well as adding a back panel and boards made of tiles too.

Aftercare

View instructions
11.Plant_Pots.jpeg

Using treated timber gives you some protection against weathering over time, but if you choose to paint you may need to refresh as it fades over time.

Give it a fresh coat every few years to keep your shelving looking its best.

Get creative with fence shelving inspiration

View instructions
12.Garden_Shelf_Decorated.jpeg

It provides the perfect opportunity for an outdoor kitchen to suit any budget. Go as grand or as simple as you like, and create a space that’s ideal for food prep when you’re dining alfresco.

Creating a planting area with plant pots and soil ready to go, and opt for a colourful display with your favourite potted plants.

Stay stocked up when you want to keep the fire roaring during the chillier months, by using your shelving as a log store that offers easy access.

10.Garden_Furniture.jpeg

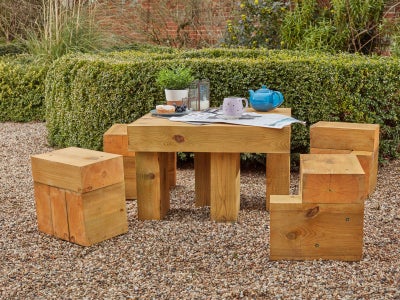
Go for different finishes, with plenty of options to choose from whether you want a natural look or fancy trying something different by treating the wood.

Add trellis panels for a more decorative touch.

For more ideas, advice and DIY how-to guides, visit the inspiration hub; and share your #WithWickes project with us online.

More inspiration from Wickes