The Big Event! Offers on Paint, Flooring, Doors & more
Skip to content Skip to navigation menu
Basket
0
191119_Autumn2_C_transformingwoodwork1.jpg

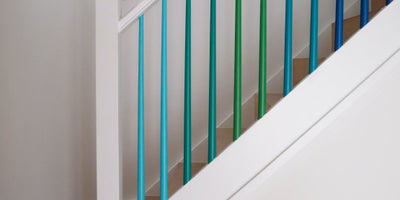
Treat, restore and transform interior woodwork, overhaul your space and enhance your interior décor. Revive scuffed skirting boards, yellowing window sills and tired mouldings, or even touch up picture rails and revamp your stairparts. All of this can be done with a fresh lick of interior wood paint.

The techniques used will vary slighting depending on what you’re working with, however, the key to a professional finish is all in the detail. Whether you have already painted woodwork or are replacing and installing untreated timber mouldings for the first time; thorough preparation, patience and TLC will give you the best finish.

Bring your rooms back to life with our top tips to transform your interior woodwork.

191119_Autumn2_C_transformingwoodwork2.jpg
Preparing to paint

Give the job the attention it needs, by making sure that your space is prepared and you have everything you need upfront.

  • Remove any pictures or ornaments close by, then move furniture into the middle of the room and cover with protective dust sheets.
  • If you’re working on woodwork close to flooring, carpet or freshly painted walls, tuck extra-wide decorators masking tape as close as possible to the edges to catch any splashes or drips.
  • Have a selection of decorating tools and supplies to hand, including various-sized paint rollers and paint brushes.
  • Once you’ve gathered your equipment, it’s time to decide on your preferred colour and finish. Go for durable satinwood, velvety matt, classic eggshell or a high gloss shine. Choose white paint for a contrast to your walls, or paint your woodwork to match your wall colour, for a trendy floor-to-ceiling finish. For a natural look, try wood varnish and wood stains to seal your surfaces.
  • Always read the manufacturer's label before you begin work, ensuring your rooms are well-ventilated and you have adequate protective workwear.
191119_Autumn2_C_transformingwoodwork3.jpg
Working with unfinished woodwork

When working with new and unfinished timber, spend a little extra time on fine and even coats for a professional finish.

  • Begin by assessing your surfaces to fill any holes, cracks, deep knots or imperfections. Use your finger to work in wood filler of the same colour, wiping away any surface excess with a cloth.
  • If you choose to enhance the wood for a natural finish, you may decide to use an interior varnish or wood stain. Apply several thin and even cloats until you have the desired look. If you decide to go for paint, begin by applying a layer of good-quality wood primer to seal the surface for a smooth finish.
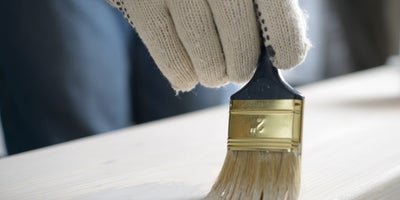
  • Once dry, use a brush to apply two or three thin layers of undercoat ensuring that you follow the grain of the wood. Allow each layer to dry between coats, then lightly sand back any high tops for a smooth finish.
  • When you’re ready to apply your colour, mix the topcoat well, then use a fresh brush to apply a thin layer, following the grain as before.
  • Remove the masking tape at a 45-degree angle while the paint is still wet to avoid cracking or peeling.
191119_Autumn2_C_transformingwoodwork4.jpg
Working with painted woodwork

Depending on the condition of your woodwork, you may need to strip your surfaces back to the bare wood, or just make light repairs.

  • To remove old paint, you will need to strip the surface with a heat gun or steamer. Just be sure not to burn the wood or over-scrape, as this can damage the surface.
  • Lightly blemished woodwork can be prepared by sanding back rough and flaked areas until the surface is smooth, with an angled sanding sponge or electric sander. This also helps to key the surface, ensuring that the paint will adhere well.
  • Wipe down with a damp cloth or sugar soap, then apply a thin layer of undercoat working with the grain of your wood.
  • Once dry, mix well then apply your chosen matt, gloss, satin or eggshell finish, to seal and protect the wood.
  • Remove your masking tape by peeling at a 45-degree angle to reveal crisp edges.

More inspiration