Adding sleepers to your garden
Planning & preparation
- In this guide, we are going to explore our favourite of the many techniques that can be used when working with railway sleepers. Our recommendations are intended to help you choose the right techniques and working solutions to take on any number of projects.
- Versatile, sturdy and durable, garden sleepers make a stylish addition to any outdoor area. Ideal for creating contemporary yet traditional landscaping, garden sleepers can be used for anything from raised beds and borders to retaining walls, steps, paths and garden furniture.
- There is no one right way to work with sleepers, but as a minimum, you will need a well-stocked toolbox, a selection of power tools, a well-ventilated working space and adequate safety equipment.
- For more sleeper inspiration, our building a sleeper table system project has advice on cutting, joining and finishing techniques for DIY garden furniture.
Doing it right
- Depending on the project you’re undertaking, we recommend researching ideas online and drawing up a design before you begin work. This will ensure you have enough materials to work with, can minimise cutting waste and have a visual guide for assembly.
- There are many ways to cut sleepers, but we recommend using a circular saw for accuracy, precision and speed. If you don’t have access to power tools, softwood projects may be completed with a handsaw, but hardwoods with require power tools.
- Consider the tolerance, runout and alignment of your power saw blades when making cuts. Depending on your tools, you may find that the dimensions are adjusted by between 2-3mm. For consistency, ensure that you cut on the same side of the scribed line each time.
- We would not recommend cutting sleepers with a chainsaw or reciprocating saw as to do so can be dangerous, inaccurate and messy. If you are having trouble cutting your sleepers, it can be worth contacting a local tradesman or specialist company.
- There are also many ways to join sleepers depending on your material and project. We recommend hex drive timber screws for softwood, however, if you use hardwood sleepers you will need to use stainless steel wood screws as the natural tannins can corrode ferrous metals.
- If you are joining full-length sleepers without cutting them, it’s a good idea to check the sawn ends before you begin, as you may find that they are not quite square and need to be planed or sanded for accuracy.
- Sleepers can be finished in many ways to suit your space and style. For a longer life against rot and decay, we recommend applying preservative treatments to protect your timber.
- Working with sleepers can be very messy. Brush down your sleepers at regular intervals to remove any sawdust and thoroughly sweep or vacuum your working area before applying any finishes to the timber.
- Watch our top tip videos for our Wickes DIY skills, tips and advice.
Staying safe
- Inspect the cables and blades of your power tools before they are plugged in to ensure they are in good condition. If any of the elements need to be replaced, make sure this is done before construction begins.
- Cutting and sanding sleepers is very messy work so adequate ventilation and protective workwear are essential. Ensure that you are wearing protective clothing including goggles, a dust mask, ear protectors and gloves.
- Sawdust lingers in the air, spreading and settling on every surface. As breathing in particles from treated wood can be dangerous, it’s important that you work in a well-ventilated space. If you can’t work outdoors, consider using an air filtration or dust extracting system, alongside a vacuum and power tool dust collector bags.
- When working with large timber, it can be a good idea to pile the timber close to your working area, so it can be gently rolled off and into position as you work.
- Sleepers are very heavy to lift and manoeuvre, so it’s a good idea to have another pair or two of hands around during your project.
- Always check the manufacturer’s label before applying any preservatives, paints, stains or treatments.
Materials
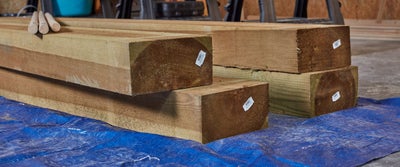
New timber garden sleepers are available in either softwood or hardwood varieties and come in a large range of colours, sizes and treated finishes. Whether you choose to work with softwood or hardwood sleepers will depend on your budget, the project and the look you’re going for.
Hardwoods such as oak are slower to grow, making them denser in structure, heavier to handle and usually more expensive than their counterparts. Highly durable and more resistant to decay without treatment, hardwood sleepers have an untreated lifespan of around 30 years and can last for as long as 150 years with good care. Rich in colour and with a prominent grain, hardwoods tend to be full of moisture so are more prone to cracking and shrinking over time.
Softwoods, such as pine, are lighter than hardwoods with more uniform square cut ends, making them easier to drill, cut and manoeuvre. Less dense and with a lighter grain, they are a budget-friendly choice and can be purchased with or without pressure treatments. More susceptible to decay, additional finishes and regular treatments can help increase their expected lifespan to around 15 years.
You should consider the physical location of your project and the drainage of the surrounding area as this may impact your choice. Hardwoods are very heavy to manoeuvre if you have a project at the end of your garden but tend to have better drainage when used as retaining walls or for raised beds.

The type of timber you choose will also impact how they are cut and fixed together. You will almost certainly need machinery and power tools to hand when working with sleepers. While a handsaw is handy for cutting small sections of softwood, a circular saw is essential for cutting hardwood sleepers, so it’s worth investing in a quality model. You will also need an impact driver or SDS drill for piloting holes and driving in the fixings.
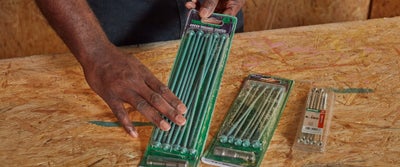
When it comes to fixings, there’s a broad range available, with sizes and shapes suitable for every purpose. We recommend using a mixture of timber screws, wooden dowels, nail plates and angle brackets for additional support.
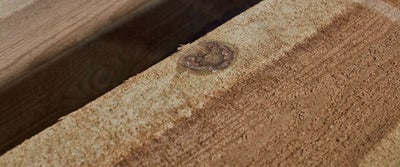
The longevity and durability of both materials vary, so we recommend considering whether you choose to work with treated or untreated timber and any additional finishes you may wish to apply. Left untreated, both softwoods and hardwoods will silver over time, due to the natural tannins being bleached by water and the sun.
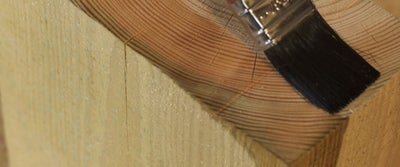
Sleepers should not be submerged in water and for the longest life, protected from the sun by shade or with UV filtering oils or finishes. Whichever you choose to work with, it’s a good idea to use a good quality wood preserver on cut ends to extend the life of the timber.
All of the timber sleepers stocked at Wickes are FSC certified from responsible and well-managed forests, as part of our Responsbile Business ethos.
Tools
If you’re kitting out your toolbox for the first time, our 10 essential power tools for DIYers has advice on everything you’ll need for efficient, effortless and expert results. As a minimum, we suggest having the following tools when working with sleepers.
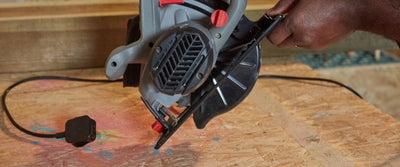
Versatile, rapid and high-powered, a circular saw will make accurate cuts for precision projects. If you can, go for a model with a laser guide, rip fence and dust collection system.
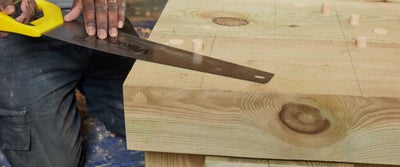
A universal handsaw - ideal for fast cutting through wood, for the best results and easiest use, go for a handsaw with an ergonomic handle, steel blade and triple ground teeth.
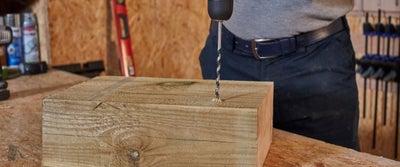
A combination drill: versatile and portable, an all-purpose drill will have you covered for a broad range of project needs. We suggest choosing a cordless model for ultimate flexibility.
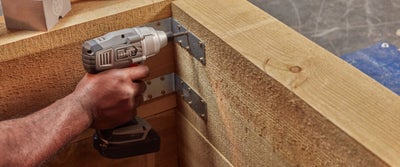
An impact driver features enhanced torque, variable speeds, powerful and controlled pulses to drive fixings into even the toughest of surfaces.
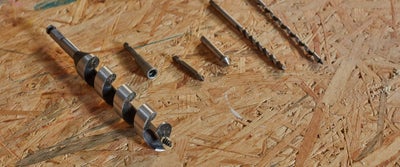
A drill bit set. Although you may need specialist sizes and driving bits for some jobs, a drill bit set will cover most eventualities. Go for a combination set to begin building your collection.
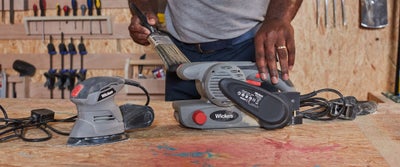
A belt sander remove rough textures and smooth over large surfaces with ease. We recommend choosing a model with integrated dust extraction and having a selection of different sanding belts to hand.
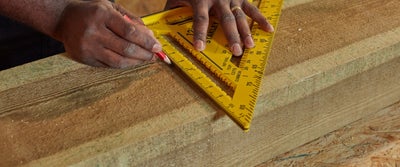
A quick square: combining a combination, try and framing square in one, this triangular carpenter’s tool makes marking out quick, easy and accurate every time. They can also be used as a fence for your circular saw.
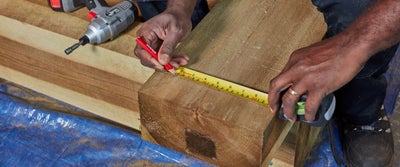
A tape measure is essential for any DIY project. Choose a retractable option with clear markings for easy reading.
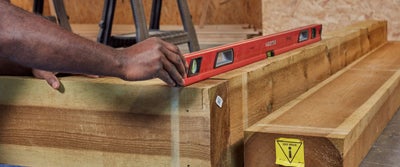
A spirit level - useful for a number of tasks and getting the job done right. Check your surfaces are perfectly level and scribe straight lines using the long edge.

Protective workwear is essential for your safety, we recommend having work gloves, a dust mask, safety goggles and ear protectors to hand.
Cutting
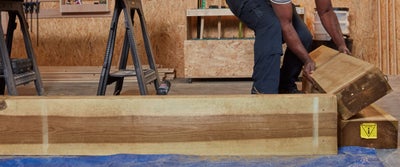
When working with larger timber, it can be useful to pile your materials close to your cutting station or working area. This is especially useful for rolling the timber off a pile, as they can be extremely heavy. It’s also a good idea to have another pair of hands around for lifting and manoeuvring.
Depending on which timber you choose to work with, there are a range of possible ways to cut sleepers. While there is no perfect method for cutting large timber, we recommend using a circular saw.
A circular saw is the most widely used method for cutting sleepers at home. The most accurate method for cutting larger sleeper quantities, you will find in most instances that the blade is not deep enough to cut through the depth in one pass. Instead, the sleeper will need to be rotated and cut in sections.
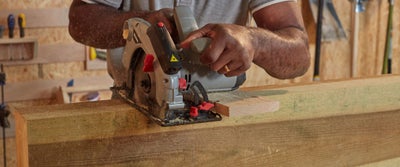
As the sleeper has to be rotated and cut on each side, we recommend using a perfectly straight edge as a cutting fence to guide your saw blade. A small piece of offcut timber is ideal for this, however, you can also use your quick square in the same way, holding it firmly as you run the circular saw shoe against it.
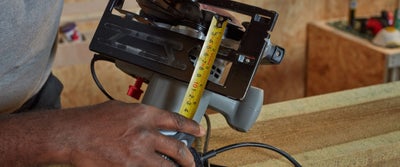
To find the correct placement for an offcut saw fence, you will need to begin by measuring from the circular saw blade to the edge of the shoe. Add this measurement to the first cut measurement, then measure out on your timber.
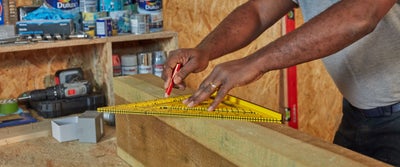
Mark the measurement with a crow’s foot then use your quick square to scribe a straight line across the width.
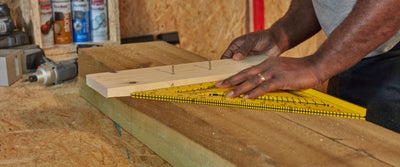
Align the offcut against the scribed line, then fix in place with a couple of screws. You’ll want to make sure this is on the same side of the line for consistency, or you may find you have a small variance in cut lengths.
Ensure you have protective wear and equipment on and remember to turn on your circular saw blade before it touches the timber to avoid snagging.
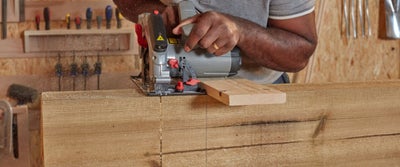
Once you have made the first cut, running the saw shoe against the offcut fence, unscrew the offcut, rotate the timber and repeat the process.
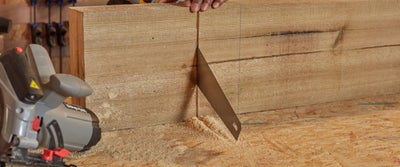
A universal saw can be used to cut through softwoods and is useful for cutting through central sections that a circular saw blade might not reach. However, they are unsuitable for hardwoods due to the density of the timber and can be hard work and time consuming to use.
We would not recommend cutting sleepers with a reciprocating saw or chainsaw. A reciprocating saw will produce wavy cuts, while a chainsaw is messy, inaccurate and dangerous to use for an inexperienced user.
If you are having trouble cutting your sleepers or you have an especially large quantity, it can be worth contacting a specialist company to have your sleepers cut to size.
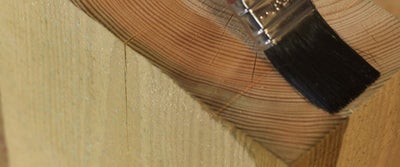
Once you have cut the timber, it’s worth treating the cut ends with a good quality wood preserver. Brush on a generous amount to eat cut end, for added protection against rot and decay.
Joining
Before you begin joining your timber, it’s a really good idea to remove any staples and check the cut ends to ensure they are as square as possible. You may find that where joins are made using uncut ends, the joints are not perfectly snug. Check with your quick square, and sand or plane back the ends until they are perfectly square.
As sleepers are extremely heavy, we recommend working on the floor or in-situ to join the timber. This will also give you traction and body strength to help drive the fixings into the timber.
The best way to secure sleepers is with appropriate timber screw. The type of wood you choose to work with will dictate the type of fixing that needs to be used.
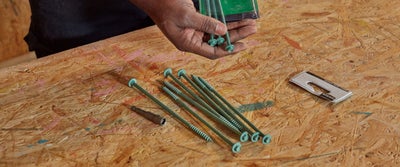
Softwoods can be fixed with a choice of steel or zinc screws. Piloting isn’t always necessary, but this will depend on the quality of your impact driver and the accuracy of your project. We recommend using heavy-duty timber screws also known as lag or coach screws. Hex drive timber screws are a great choice for their easy use. You can even choose to countersink the head of the screw before fixing for a flush and tidy finish. For a traditional look, countersunk holes can be filled with dowel plugs too, however, if you prefer simple fixings, flat head timber screws also work well.
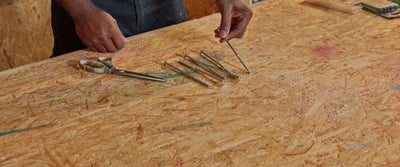
If you choose to work with hardwood, you will need to use stainless steel screws. The natural tannins in hardwoods can corrode non-ferrous fixings over time, so you’ll need to use stainless steel screws every time for the best results. As hardwoods are denser to work with, you will also need to pilot the screw holes each time with a multipurpose drill bit or auger wood bit.
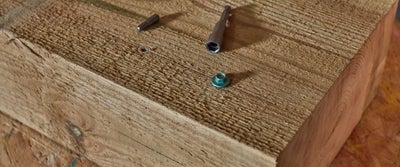
Whichever type of fixing you use, just ensure your screws are around a third of the length longer than the depth of your timber, to ensure any joints are properly secured. You will also want to ensure you use a bit to pilot your timber that is the same diameter and length as your screw.
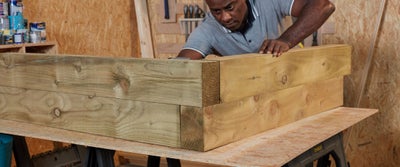
There are many types of joints that can be used to join sleepers however we think a simple butt joint is an effective choice. They are also especially useful for creating the right-angled joints that are commonly used on raised beds, steps and retaining walls.
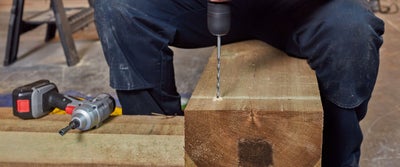
We recommend piloting your first sleeper length before butting it up to make the join. Using your tape measure and quick square, measure, mark and scribe a straight line and decide on your fixing placements. These tend to look best when they’re uniform so it’s worth spending some time getting this right.
Pilot through the first fixing holes then move the timber into position, so it’s butted up against your second timber length.

Sleepers are best constructed on a firm and level surface such as soil, grass, decking or concrete, however, you should still use a spirit level to ensure the surface is as level as possible. Depending on your project, you may wish to use sand, cement or timber offcuts to level things out. For retaining walls and steps, it’s also worth using a string line to check your levelling.
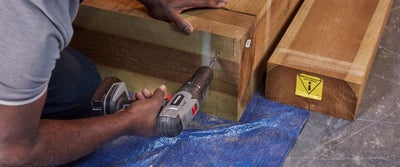
When you have butted your timber joins together, you’ll want to pilot through the first holes again, so the bit penetrates partway into the next length.
Depending on the fixings and finished look you are going for, you may choose to use a countersink or spade bit to bevel a small hole for the head of the screws to sit in.
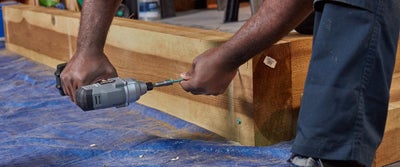
Ensuring that the joint is snug and flush, use an impact driver to secure the fixings through each hole to the screw to penetrate the adjoining sleeper, and ensure the screw head is sunken or flush to the surface.
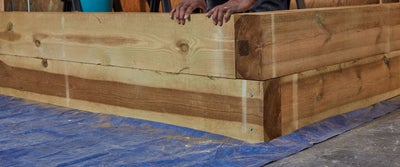
When building sleepers in layers, it’s a really good idea to overlap the right-angled corners for added stability and strength. Simply place your length or frame on top of the first layer so the joins are overlapped like a brick wall, then work in the same way to secure. Once the joints are secured, you can drive fixings down through the layers or you can use dowel for a more traditional look.
Fixings for additional support
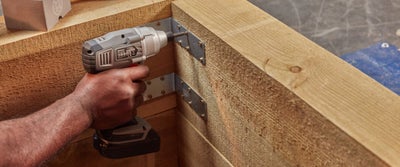
For added internal support where there are several layers of sleepers, it can be a good idea to use corner brackets and fixings plates. Where sleepers are used as planters, raised beds, borders or retaining walls that support large amounts of soil, this can add further stability.
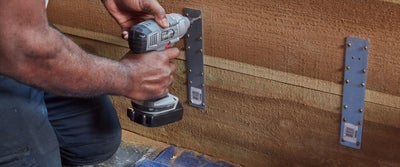
Available in a huge array of lengths, shapes and sizes, use timber screws to secure fixing plates across timber lengths and brackets to reinforce corner joints.
Using timber dowel to peg through sleeper lengths is another effective way to join timber providing additional strength for a more traditional look. We recommend using dowel alongside timber screws for fixings to ensure the sleepers are really secure.
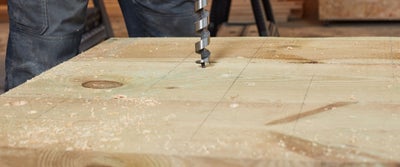
Using an auger bit that is the same diameter as your dowel and longer in length than the width of your sleeper, pilot down through the centre of timber so the auger pilots partway into the length below. You may need to withdraw the auger several times to remove wood chips and sawdust.
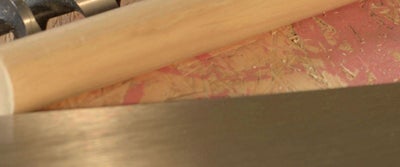
When you prepare your dowel pegs, you’ll want to cut each section so it’s slightly longer than your auger bit. This is to allow for any variance in the length of the pilot holes and help you gauge how far the dowel has driven into the timber.
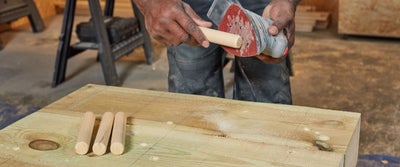
To help the dowel enter the second timber length, it’s also a good idea to taper one end of each section to slightly round it off.
When working with timber, you should always use a wooden mallet for manipulating wood into place and hammering dowel. If you do not have a wooden mallet to hand, you can use a metal hammer and an offcut to strike against. This prevents the metal hammer from marring your wood and ruining and surface.
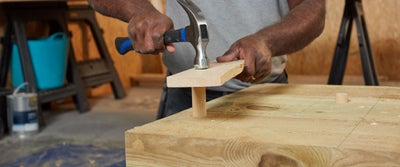
Bang each dowel peg into place using your offcut length as a striking board, until they won’t go any further. It can be useful to draw a small line on the side of the dowel and banging it in a few more times to check it won’t go any further.
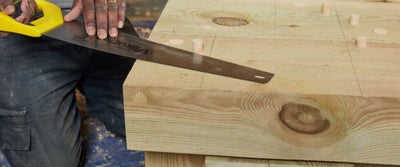
When you’re happy the stakes won’t go in any further you can remove the excess with a universal saw, holding the blade so it’s flush with the surface of the timber.
Using wooden stakes to secure your sleepers is another popular method for adding stability. Sink around 60% of the stake supports into the ground, setting with cement if preferred then simply drive your fixings through the sleepers and into the supports.
Finishing
The beauty of working with sleepers is that even in their natural state, they are as attractive as they are highly finished. The finishes you choose will entirely depend on your space, style and the project you’re working on.
Depending on the type of the fixing you’ve used, concealing screw heads with dowel plugs is an effective and traditional way to conceal the screws for a flush and tidy finish. Using the same principles as with dowel pegs, bang the plugs into place then remove the excess with a universal saw.
Depending on their intended use, once you have added any additional finishes to your sleepers, you will probably want to give them a good sand down. If your project will be sat on or used as a tabletop, we recommend paying extra attention to the top lengths to remove rough textures, marks and indentations.

Using a belt sander and a coarse grit paper is the easiest way to do this. Working with the grain, run the belt sander slowly over the sleepers until each surface is smooth. For extra detailing, you can use a fine grit sandpaper to help expose the natural grain.
Adding a small chamfer to the edges of your sleepers is a simple way to add a little extra finishing touch to your project. Depending on the size of your project, use a palm sander, a belt sander or wood planer to remove the high profile edges to create a smoother finish.
The finishes you apply will depend on the timber you have chosen to work with. Hardwood will weather well without treatment for many years, while softwood sleepers are best treated with a preservative for a longer lifespan. Whichever material you choose to work with, we recommend applying finishes to help protect against rot and decay.
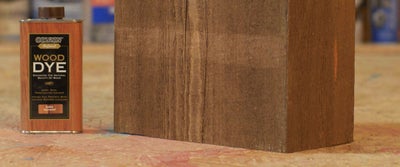
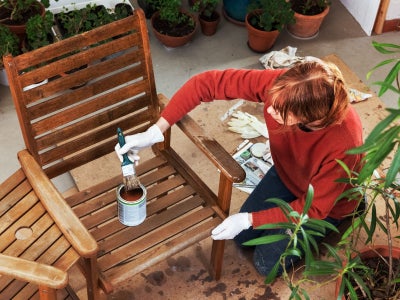
Wood dye is a great choice for changing the colour of your sleepers while allowing the natural grain to show through. Penetrating the surface for a richly pigmented colour, simply brush on a couple of generous coats. Depending on their usage and where you live, wood dyes are best when they are maintained every few years to combat fading.
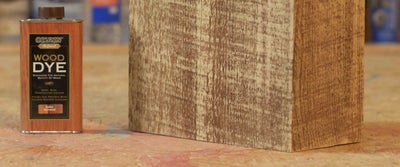
To add an antique look to new sleepers, apply a coat of wood dye then sand back the surface to add a weathered effect.
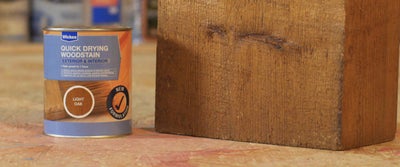
Available in a broad spectrum of colours, wood stain offers great weather protection while enhancing the natural textures of your timber. Easy to apply and with water repellent qualities, you can even sand back the surfaces for a more natural look.
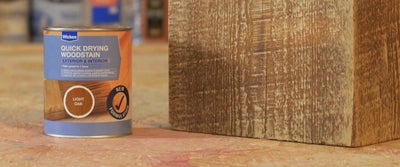
Wood stains also look great when sanded back and should also be maintained every few years for the best colour.
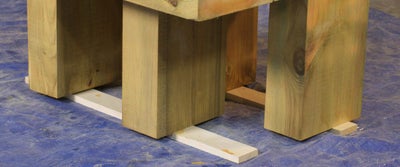
Wood oil is best for protecting your timber against UV rays and can help slow the silvering process down. Penetrating the surface to create a natural sheen and replace the oils lost through weathering, they are a good choice for keeping sleeper furniture in great condition and should be reapplied every year or according to the level of wear.
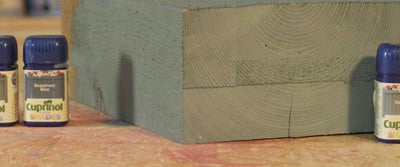
Exterior paints are available in a vast range of bold, neutral and garden shades and are the easiest way to transform your sleepers. Great for theming or zoning your spaces, the natural textures of your sleepers are enhanced with rich pigments.
Depending on where they are used and the region that you live in, you can expect wood paints to look great for around 5 years. When they begin to look tired, give the surface a sand back and apply a couple of fresh coats according to the manufacturer’s instructions.
Once you’ve added any finishing treatments to your sleepers, you may choose to add additional fixtures or fittings.
If you’ve built a sleeper planter, raised bed or retaining wall, we highly recommend lining the interior with landscaping fabric or polythene sheeting. Secure with heavy-duty staples, this will act as a barrier helping to reduce moisture and preserve the timber.
Adding a layer of hardcore to the base of beds and steps before you add aggregates, soil or compost, will also help improve drainage.
Aftercare
If you find that the surface of your sleepers becomes weathered, worn or faded after applying finishes, you may need to apply a couple of fresh maintenance coats.
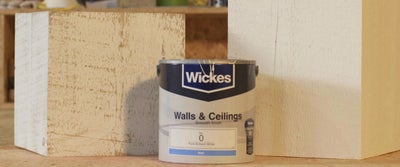
Sand back the surface for a smooth application, then re-coat according to the manufactures directions.
Get creative with sleeper inspiration
Once you have mastered the basics of working with sleepers the project options, design and finishes are endless.

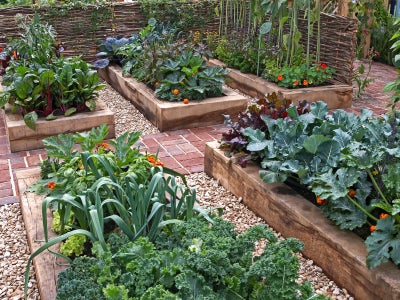
Build a raised bed for your flowers, bedding plants and veggies. Go for traditional square and rectangular beds or get creative with the design and opt for triangular or bespoke shapes to suit your space.
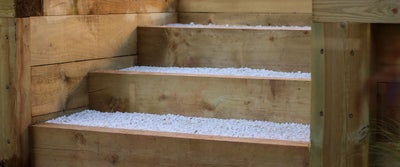
An attractive alternative to concrete, stone or decking, try building garden steps from sleepers. A great choice for sloped or sectioned gardens, fill with decorative stone and gravel, or extend your lawn with turfed steps.

Pave the way with sleepers. A great choice for winding walkways and a more natural inspired look, use railway sleepers as a garden pathway. Sink into the ground or fill the spaces between with decorative stones and gravel for a stylish landscaped look.
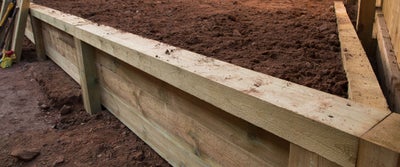
Both practical and attractive, sleepers make fantastic retaining walls. Positioned vertically or horizontally, design your space to follow the natural curves and slopes of your garden.
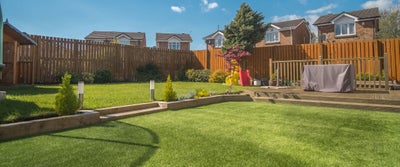
Zone your garden and line your beds with sleeper borders. Use long lengths for straight edging or get creative with offcuts and shaped sleepers for some landscaped styling.

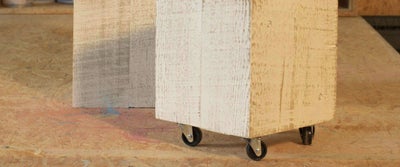
When lined with landscaping fabric and mounted on castor wheels, sleepers make fantastic planters. Go large and plant up a bed of mixed flowers and veggies or maximise year-round manoeuvrability for a small tree or large shrub.
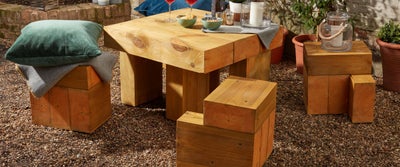
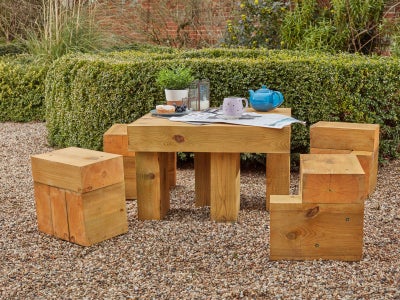
Build your own DIY garden furniture such as a garden table or bench. Sturdy, durable and versatile, sleeper furniture makes for a handsome addition to your outdoor spaces and when treated with adequate finishes, will last for many years to come. Watch our sleeper system table project for more inspiration.
A great way to use leftover lengths and offcuts, position around your garden for added decorative interest. Add a potted plant for additional height, use as a stool or enjoy as a bird perch amongst your flower beds.
Create an al-fresco relaxation area from sleepers. A stylish alternative to traditional decking, add a pergola for climbing plants and solar lights.
Build a raised garden pond or children’s sandpit. Using the same design principles, secure and line with a good quality pond liner before filling for your desired use.
Conceal your recycling or start your own compost heap with bespoke sleeper storage. Attach a hinged lid or door to a simple frame to hide your bins or nutrient-rich compost pile.
Not just for outdoor use, highly finished sleepers can look fantastic inside. Used for anything from steps and mantles to dining and end tables, leave in their natural state or paint and sand back for interesting textures and repurposed appeal.
For more ideas, advice and DIY how-to guides, visit the inspiration hub; and share your #WithWickes project with us on our site or via Instagram.
