Laying laminate flooring
Modern laminate flooring is now a very popular choice to use in the home. It’s hard-wearing, long lasting, and there is a huge variety of styles and shades to choose from. This type of flooring is easy to maintain and is ideal for high traffic footfall areas.
Laying down laminate flooring is quite straightforward, but thorough and careful preparation is absolutely vital if you want to avoid problems in the future. It’s crucial to determine if your sub-floor is suitable, especially with regards to moisture content. Laminate flooring is even compatible with underfloor heating.
Laminate flooring uses some form of click-fit, or tongue and groove fitting system – many manufacturers have patented their own designs. Be sure to check the manufacturer’s instructions for guidelines. This guide covers how to fit laminate flooring with Rapid Fit and Twin Clic systems. The Rapid Fit system has a wider range of options and is easier to lay - it’s ideal if you’re laying laminate flooring alone or in a large room. Twin Clic flooring needs two people to lay it.
Do I need underlay for laminate flooring?
It’s essential that your sub-floor is clean, level, and damp-proof. Laminate flooring needs an underlay whether you’re laying onto concrete or onto an old wood sub-floor. Underlay brings many benefits, such as noise reduction, heat insulation, added comfort underfoot, and an extended lifespan to your flooring.
There are a number of different underlays suitable for use with laminate flooring.
- If you’re laying onto a wooden sub-floor then fibreboard underlay is very popular as it provides excellent heat insulation. It’s also the best choice if your sub-floor isn’t perfectly level, as it will cover any minor protrusions, i.e. up to 3mm high.
- If you’re laying onto a concrete sub-floor then you need to choose an underlay with an integrated damp-proof membrane, such as foam. You can still use fibreboard, but you will need a separate damp-proof layer too.
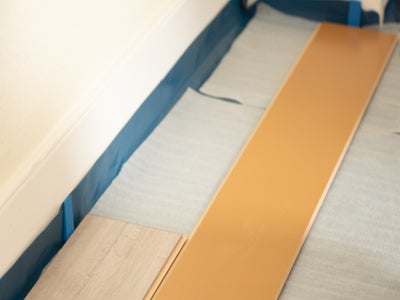
Fibreboard underlay needs to be laid at a 90-degree angle to the direction your flooring will be laid. When you’re laying foam underlay you will need to seal any joints with waterproof tape. Whatever underlay you choose, be sure to follow the manufacturer’s instructions for laying. Underlay often benefits from acclimatising to the room, just like flooring.
Laying laminate flooring on concrete
Because concrete is porous you will need to check its moisture levels before laying down your floor. As a general guide you can use duct tape to securely stick down 1m2 of polythene onto the concrete and leave overnight. If your concrete is damp, water droplets will collect on the underside of the polythene.
Alternatively, you can use a professional moisture meter for a more accurate reading. Concrete sub-floors should have a moisture content of 12% or less on a prong test, or 3% or less on a moisture meter. Refer to the manufacturer’s instructions for further details. If your concrete is too damp the cause will need to be investigated and resolved before you lay down any flooring.
If your concrete is suitable you can apply a damp-proof membrane to ensure that no moisture gets through in the future - refer to the manufacturer’s instructions. Alternatively, you can choose an underlay with damp-proof protection.
How much laminate flooring will I need?
To calculate the number of packs you need, work out the size of your room in m2 (length x width = m2) and check against the coverage of the pack. Add an extra 10-15% for cutting and wastage.
Laminate flooring needs to acclimatise to the room it’s going to be laid in. Store the unopened packs flat for at least 48 hours. Don’t stack the packs more than three high, and preferably wedge something between each pack so the air can circulate fully around them. Never store the packs by leaning them against the wall, which can lead to them bending. If you’re laying laminate flooring onto underfloor heating then lay each pack on the floor separately – don’t stack them at all.
Where do I start laying laminate flooring?
If you’re laying onto concrete, or a new sub-floor then the direction you lay your floorboards is up to you. Laying towards a light source makes the joins less visible. Laying horizontally or vertically will influence the perspective of the room, making it seem wider or longer.
Therefore it’s a good idea to ‘set out’ your floorboards prior to laying, so you can work out how they will be arranged and how wide the last edge row will be. Flooring requires an expansion gap of 10-12mm around the edges to allow the wood to expand and contract naturally over time. Failure to include an expansion gap can warp and damage the floorboards in the future.
If your skirting is at least 10-12mm thick then it can be removed before fitting and reinstalled once the laminate floor is laid down. Or you can replace the skirting with flooring trim.
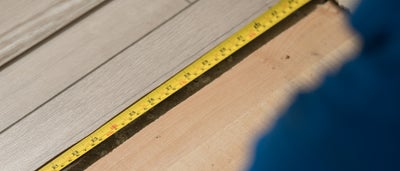
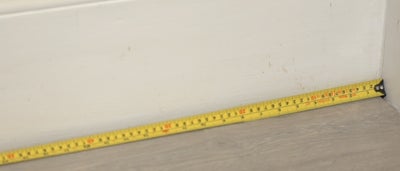
To work out how many rows you need, measure the width of the room and divide this by the width of a flooring panel, allowing for expansion gaps. If the width of the final row is less than 60mm you’ll have to trim your first board lengthways to accommodate the necessary extra width. The aim is to avoid having edge boards which are too thin.
Setting out also helps with positioning boards which will adjoin pipes. Pipes should sit in the middle of the board’s width, not at the edges. This makes cutting much easier later on.
Start the first row in the corner of the longest wall and work your way back from there.
How do I fit laminate flooring?
The process for fitting Rapid Fit and Twin Clic laminate flooring is basically the same, with one key difference which depends on the board locking system. This guide covers both but concentrates on laying Rapid Fit laminate flooring.
Make sure you have removed any doors before you fit the flooring, as you will need to cut into the architrave.
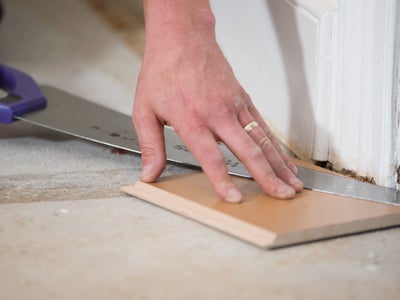
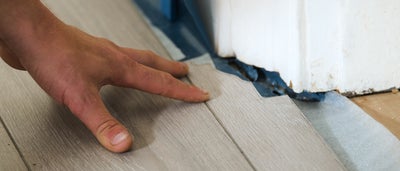
Line up an offcut of the floorboard with the architrave. Use a panel saw to trim the architrave so that the floorboard will fit underneath. Use a hammer and chisel to remove the excess wood.
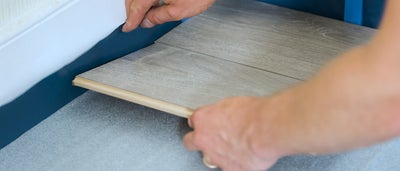
Ensure the floor is thoroughly prepared and the underlay is in place. Starting in the corner of the longest wall, lay the first piece of laminate with its tongue edge against the wall.
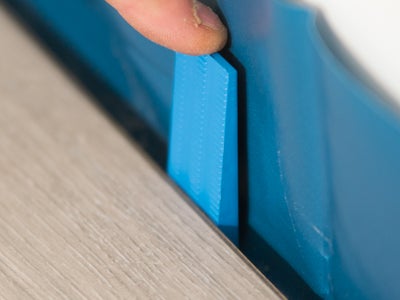
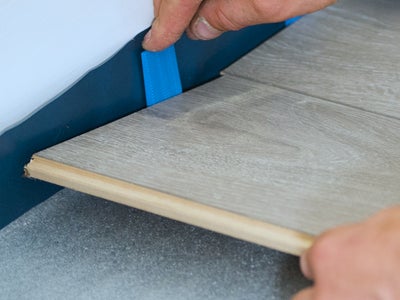
Then place 10-12mm flooring spacers between the wall and the board to create the expansion gap. Place a couple of spacers along the length of the board and one across the width.
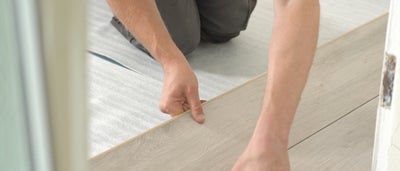
Line the next board up with the end of the first and press down to click it into position. Make sure the alignment is precise, as you want the first row to be perfectly straight. Add flooring spacers to maintain the expansion gap. Repeat this process until you can’t lay any more full boards.
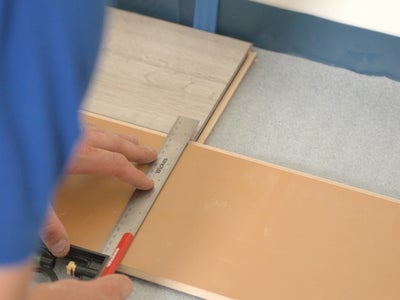
You will need to cut the last board to fit the gap at the end of the row. Lay a full board down next to the row you’ve just fitted. Flip the board upside down with the groove edge still facing you.
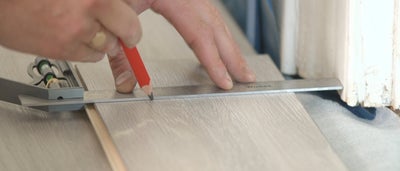
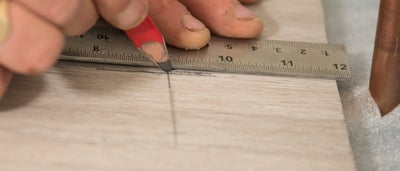
Measure and mark a cutting line on the underside of the board. Then secure the board in a workbench and cut with a jigsaw or panel saw. Fit the board into position to complete the first row.
If the offcut from the first row is at least 300mm long, then you can use it to start your second row from the same end that you started your first row. Never start a second row with a full length board. You are aiming to make sure that the joints between boards are staggered across all the rows. This both looks good and provides better stability. Remember to use a flooring spacer at the start of each row, then lay down the boards by repeating the above process.
To start the second row, put a flooring spacer against the wall then place the tongue edge of a new board into the groove edge of the previous row. Slot the board in from a 20-30 degree angle. Make sure the end of the board butts up against the wall spacer.
Line the next board up and press into position using the same method to make sure the tongue and groove system clicks into place properly. Work your way down the row and repeat for all rows until you reach the edge row.
You may need to cut boards to fit the gap in the final row, but this will have been decided when you were setting out. In which case measure the gap between the last full row and a flooring spacer. Cut the board to size and lay as normal. Remember to allow for expansion gaps.
How do I lay laminate flooring around a door frame?
First of all make sure that the door will clear any new flooring, and a threshold bar if you’re fitting one. You may end up having to trim the bottom of the door to make room. Then make sure you have cut away a section of the architrave to accommodate the new boards (as detailed earlier).
If you need to fill a gap between your board and the door, measure the distance between the outer edge of the architrave on either side. Then measure the gap between the first row and the door. Mark these measurements onto a board and cut it to size, remembering to allow a 10-12mm expansion gap at each end.
Lay the board up against the architrave and mark where you need to trim the ends so that the board will be able to slide under the architrave. If you are laying boards vertically you’ll need to do this to all the boards that come into contact with the architrave. Cut along the guide marks with a jigsaw or panel saw.
In order to fit the door piece, you may have to slide a row or rows back to make room. Make sure the door piece slides under the architrave. Then continue to lay any rows as before.
If you’re fitting a threshold bar be sure to choose one that’s appropriate for your flooring. Carefully measure the width of the door frame, allowing for a 10-12mm expansion gap on both sides. Then cut the threshold bar to size and secure it with either grab adhesive or screws, depending on the manufacturer’s instructions.
Laying Twin Clic laminate flooring
Twin Clic laminate flooring has a different locking mechanism to Rapid Fit, but otherwise the process is exactly the same. For Twin Clic flooring, boards in the same row are joined end to end by clicking them in from 20-30 degree angles.
When laying a new row, you’ll have to click the boards into position along both the horizontal and vertical edges. This can prove awkward with full length boards so it’s often easier to ask someone to assist you.
How do I fit laminate flooring around radiator pipes?
If you need to cut around a radiator pipe, lay your board next to the pipe and pencil a line on the board to show where the centre of the pipe will be. Then lay the same board front onto the pipe and again draw a mark from the centre of the pipe which intersects with your first line. Where the two lines intersect marks where you need to drill.
Draw a pair of straight lines from the edges of the hole to the edge of the board. Each line should run at a slight outward angle.
Use a jigsaw or hacksaw to cut along these lines. Remove the wedge but keep it as you’ll need it later. Fit the board into position around the radiator pipe. You may need to trim the profile edge with a chisel. Lay down the board, then push the wedge back into place using grab adhesive. Add a pipe surround for a neat finish, securing it with grab adhesive.
How do I fit laminate skirting and trim?
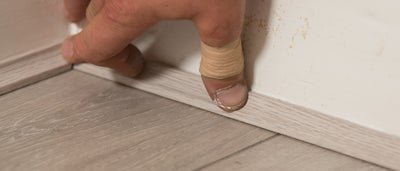
If your original skirting covers the expansion gaps, then refit it now. Alternatively you can use floor trim, especially if you have laid down flooring without removing the skirting.
Remove the flooring spacers and measure the lengths of flooring trim you will need.
Use a mitre box and panel saw to make accurate 45 degree cuts at the ends that will join in the corners.
