The Big Event! Offers on Paint, Flooring, Doors & more
Skip to content Skip to navigation menu
Basket
0
130320_ABC2_raisedsleeperbed_1.jpg


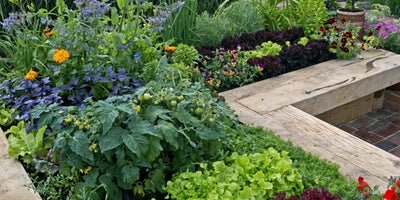
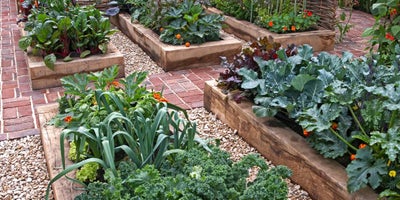
An ideal material for building raised beds, garden sleepers are a popular choice thanks to their rustic look and rugged reliability. Giving you plenty of design freedom to suit the layout of your garden, they can be cut to any size and are ideal for growing flowers, trees, soft fruits, vegetables, plants and shrubs.

Providing optimum growing conditions, raised sleeper beds offer improved drainage, increased

temperatures and enhanced root health, making them ideal for outdoor areas with awkward spaces and varying soil quality.

Whether you’re looking for inspiration or are ready to get underway with your build, find our top tips and advice for planning your raised sleeper bed project.

130320_ABC2_raisedsleeperbed_2.jpg
Deciding on your design

When thinking about the design of your raised bed, begin by considering the size and shape of your garden and how the bed will fit into your garden landscaping. Do you want your raised bed to feature as a focal point of the space, streamline your current bedding for neater borders, or discretely tuck into a corner for contained growth?

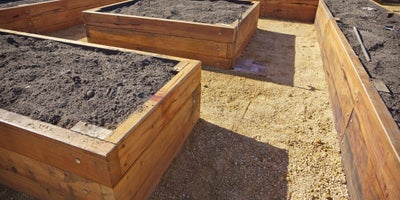
Get creative to make the most of your outdoor space. Whether you opt for classic rectangles, a row of smaller square beds, or diagonal frames to suit a corner plot, raised planters offer great flexibility for any area of the garden.

When deciding on the height, think about whether you prefer to sit, stand or kneel when gardening. It’s important to work out the most comfortable and practical dimensions for yourself.

Consider the access. If you build a long run of raised beds, you may be tempted to step over the soil rather than use a path or walkway to get around your garden. You should also consider the surrounding areas to ensure you have enough space to manoeuvre a wheelbarrow or lawn mower.

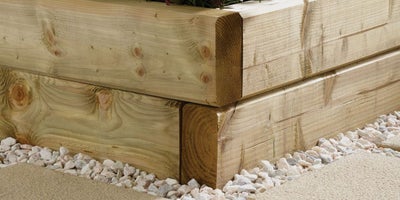
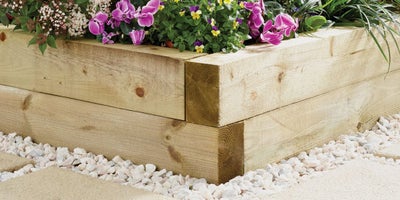
Raised beds are traditionally constructed from sleepers that are fixed at right angles to form a frame. There are many ways to construct sleeper beds but we recommend laying your sleepers in frames, so the corner butt joints are overlapped and secured with heavy-duty exterior timber screws. Sleepers are heavy by nature, so if you are only building a frame with one level, you may choose to position the sleepers without fixing.

Sleepers can be laid on their widest side or edge for additional height, so consider how you will use the material when you’re planning the design to ensure you have enough timber to hand.
130320_ABC2_raisedsleeperbed_3.jpg
Choosing the right location

While they offer plenty of flexibility when it comes to your construction location, you’ll want to make sure your bed is situated in a fairly open area that gets plenty of sunlight. You’ll also need to make sure that there are no overhanging trees that might stop rainwater from reaching your beds. Placing beds near hedges or semi-permeable fencing is also a good idea as they allow for a filtered airflow.

New timber sleepers are very heavy so it’s likely you’ll need a hand moving your materials into position. Where possible, we recommend setting up your cutting station as close as possible to your chosen location and having your tools to hand, to build in-situ for ease.

130320_ABC2_raisedsleeperbed_4.jpg
Clearing and levelling

Sleepers can be laid directly on cleared, level and firm soil but you may choose to submerge the first frame if you plan on adding multiple frames for height.

Begin by clearing the area of any vegetation and remove excess soil to another bed or tarpaulin sheet. This soil can be used to supplement other beds or fill the raised bed back up later on.

If you are submerging the first sleeper frame, you’ll want to dig a small trench around the bed with your shovel, that’s the same width and around 2/3rds of the depth of your sleepers.

To ensure your bed frames are as level as possible, we recommend using a spirit level or string lines and stakes for accuracy. If you’re dealing with a particularly sloped area, you may wish to use paving slabs, blocks or offcuts of timber to level everything up.

If you choose to add multiple frames to your bed or plan on building a bed that will contain a large amount of soil, it’s a good idea to give your bed some internal support. To do this, we recommend sinking retaining stakes between 300mm and 450mm into the ground at each corner of your bed then along the inside of the perimeter. You may also choose to use fixing plates and angle brackets which are secured at the final stage.

130320_ABC2_raisedsleeperbed_5.jpg
Cutting and positioning

Depending on your chosen design, you may need to cut longer sleeper lengths to size or you may be able to purchase pre-cut lengths.

Whether you choose to work with softwood or hardwood sleepers will depend on your budget, level of maintenance and how long you expect your project to last for. While softwoods are easier to work with and a more budget-friendly choice, you can typically expect a longer life from hardwood builds that have been treated with suitable finishes.

Accurately cutting timber sleepers at home is best achieved with a circular saw. Set your saw to its maximum depth then measure, mark and scribe your cut line on each sleeper. Ensuring you are wearing protective equipment including safety goggles, gloves and a dust mask, run the blade through eat cut line until each frame is cut to size.

Sleepers can be quite rough to touch, so it’s a good idea to sand back the top surface with a belt sander until smooth. If your sleepers are wide enough that it’s likely they’ll be sat on, you may also choose to plane each edge for a slightly chamfered profile and to aid water run-off.

We recommend treating cut timber with good quality wood preserver before fixing the frames in place. There are options available with water-resistant properties and UV filters that will help slow the natural greying process down.

Lay each length of your sleeper frame in position then double-check everything is level with your spirit level. The cut ends and butt joints should be as snug as possible for a solid join.

130320_ABC2_raisedsleeperbed_6.jpg
Fixing and supporting

There are many ways to join sleepers, but we recommend using heavy-duty timber screws for garden landscaping. Make sure you choose fixings that are approximately a 1/3 longer than the depth of your sleepers, so they sufficiently enter the join for a secure hold. If you choose to work with hardwood sleepers you will need to pilot each fixing hole first and use stainless steel timber screws to avoid natural tannin corrosion. 

Ensuring your sleepers are snug and in position, use an impact driver to drive two screws through each butt joint. Repeat until each frame is secure, then if you’ve used additional support, secure a screw through each sleeper into the retaining stake. 

For single-level frames or lower structures, you can also use fixing plates and angled brackets to secure the timber lengths together. Simply lay the frames into position then secure the fixings with wood screws. You can also use these fixings for additional support in the corners and across tall frames. 

For a traditional finish, driving timber dowel down through the sleeper lengths is a popular method for adding further strength and support. To pilot a hole that is the same diameter as your dowel, you will need to use an auger bit before hammering dowel lengths into place until they are snug and won’t go any further. The excess can then be removed with a universal handsaw for a flush finish.

130320_ABC2_raisedsleeperbed_7.jpg
Waterproofing and sealing

As your raised bed will be exposed to year-round elements, we recommend treating the timber with a suitable finish for a longer life against rot, wear and decay.

From specialist treatments to dyes, varnish, stain and oil, there are many ways to protect and finish your sleepers. For finishing ideas and advice on application and maintenance, find our 5 ways to treat exterior wood.

Although raised beds are usually constructed on free-draining soil, we recommend lining the bottom of your bed with a generous drainage layer of hardcore, stones or coarse gravel.

Lining your raised bed with landscaping fabric, polythene or permeable membrane before adding in soil, is also a popular choice for increased durability. Using heavy duty staples and a staple gun, secure the liner to the sides of the bed before trimming the excess away. If you are planning on planting small trees, plants and shrubs, lining the bed is not necessary.

130320_ABC2_raisedsleeperbed_8.jpg
Planting up

Once you’re happy that your construction is solid and has been finished to your requirements, it’s time to fill the bed with compost and plant up your chosen shrubs.

The added advantage of raised beds is that you can choose the best soil to your planting needs such as a more acidic mix for camellias, rhododendrons and azaleas. 

If you removed any excess soil during clearing, give it a good fork through before filling your bed back up. You may also choose to add a layer of mulch such as bark chippings or decorative stones to help retain moisture.

If your topsoil is unsuitable or you need to supplement the volume, use a good quality bedding mix, or make your own with 7 parts topsoil, 3 part peat and 2 parts sharp sand. 

We recommend allowing new compost and soil up to two weeks to settle before planting, and suggest replacing nutrients and fertilizer every 12 months for improved conditions.